Instructional Guide: Zoom Transcribe

Overview

Use the Audio transcript option (under Cloud Recording) to automatically transcribe the audio of a meeting or webinar that you record to the cloud. After this transcript is processed, it appears as a separate .vtt text file in the list of recorded meetings. In addition, you have the option to display the transcript text within the video itself, similar to a closed caption display.

The transcript is divided into sections, each with a timestamp that shows how far into the recording that portion of the text was recorded. You can edit the text to more accurately capture the words, or to add capitalization and punctuation, which are not captured by the transcript.

You can search for text within the transcription and you can search for transcribed recordings that include the text you are searching for.

Audio Transcripts are saved in .vtt format. If you download the .vtt file, you can open it with a text editor such as Microsoft Word, Text Edit, or other common word processing applications.

To enable the Audio Transcript feature for your own use:

  1. Sign into the Zoom web portal and navigate to My Meeting Settings.
  2. Navigate to the Cloud recording option on the Recording tab and verify that the setting is enabled.
    Notes:
    • If the setting is disabled, click the Status toggle to enable it. If a verification dialog displays, choose Turn On to verify the change.
    • If the option is grayed out, it has been locked at either the Group or Account level, and you will need to contact your Zoom administrator.
  3. In the Advanced cloud recording settings, click the Audio Transcript checkbox to enable it, then click Save to confirm the change.

Instructional Guide

The guide below shows how to use the Zoom transcription tool which is ideal for an Interview.

By: Reginald Govender

Step 1:

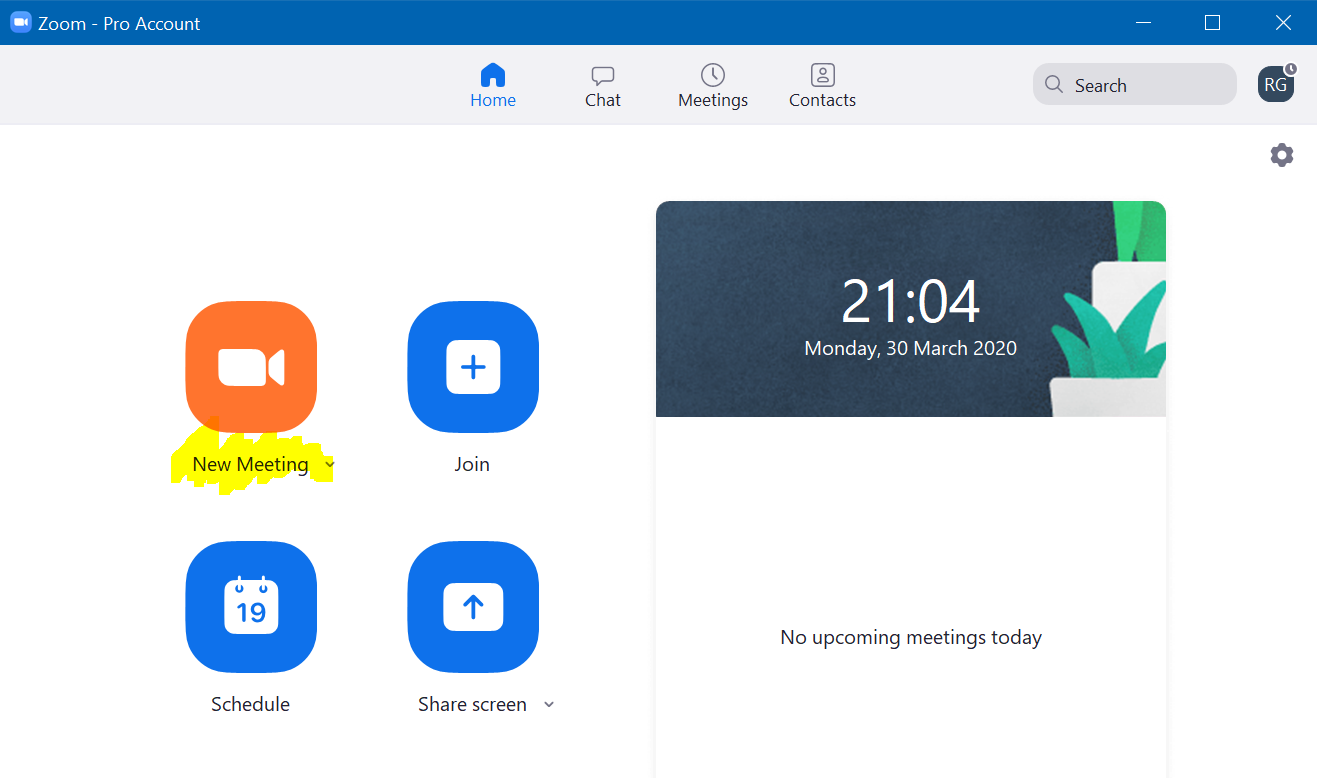
  • Select New meeting.

Step 2:

  • Make sure you are Unmuted (The video doesn’t have to be activated). 

Step 3:

  •  Select More » Select Record to Cloud.

Once recording starts, you can start to speak or if you have others in the meeting, they can also speak.
Note: Use the raise hand for turn to speak, which creates order in the meeting by giving participants a chance to speak, as they use the raise hand.

Step 4:

  • When done … Select Stop (square icon)  » Select End Meeting.
  • Note: You can pause and stop recording whenever necessary. The recording would not be saved on your local computer, but it is saved on the Zoom cloud service.

Step 5:

  • Login to your Zoom account via a browser like Google Chrome » Select Recordings (make sure it is under Cloud recordings ) » Select meeting name under Topic (see yellow highlight in example below).
  • Note: You can access the recording via the client software installed on your computer, but you will eventually be required to go onto the website.

Step 6:

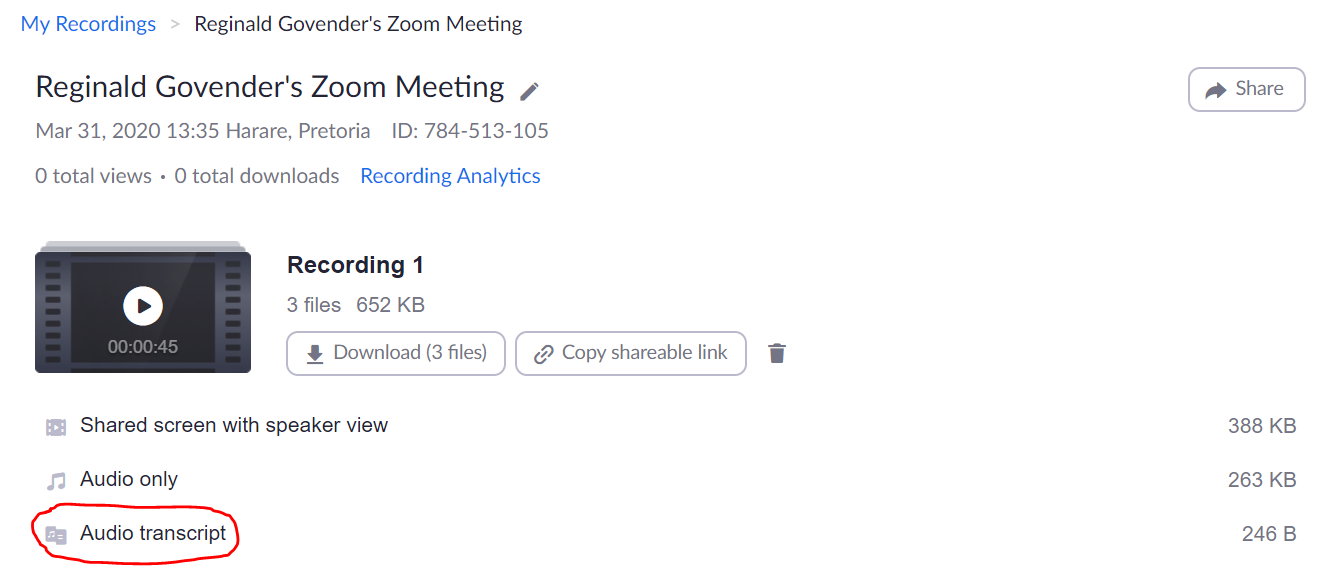
  •  You will be shown 3 files.

Step 7:

  • Download the Audio transcript file ONLY.
  • After downloading, it should appear in your download folder:

Step 8:

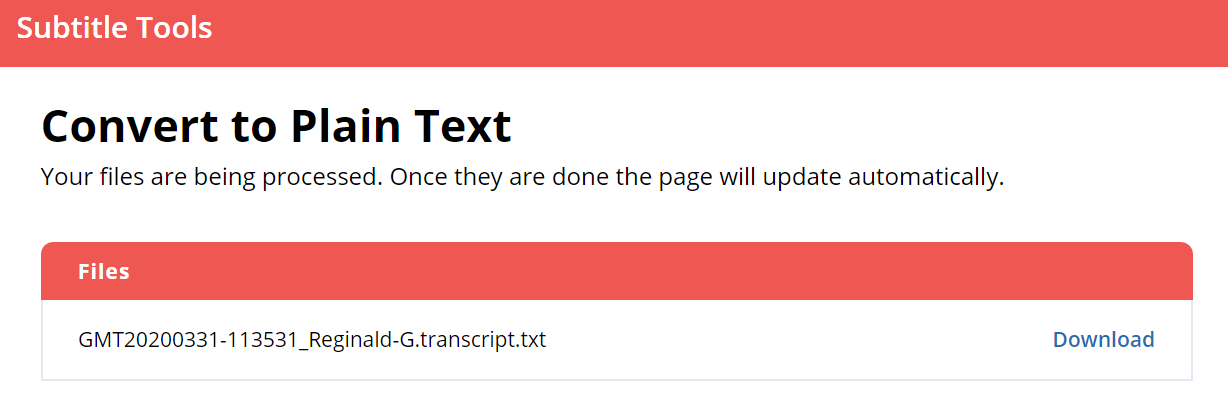
  • To convert the subtitles file to plain text:

    Go to this website: https://subtitletools.com/convert-subtitles-to-plain-text-online
    Upload the Audio transcript file (.vvt) which you downloaded in step 7 » Select Extract text.

Step 9:

  • Select Download.

Step 10:

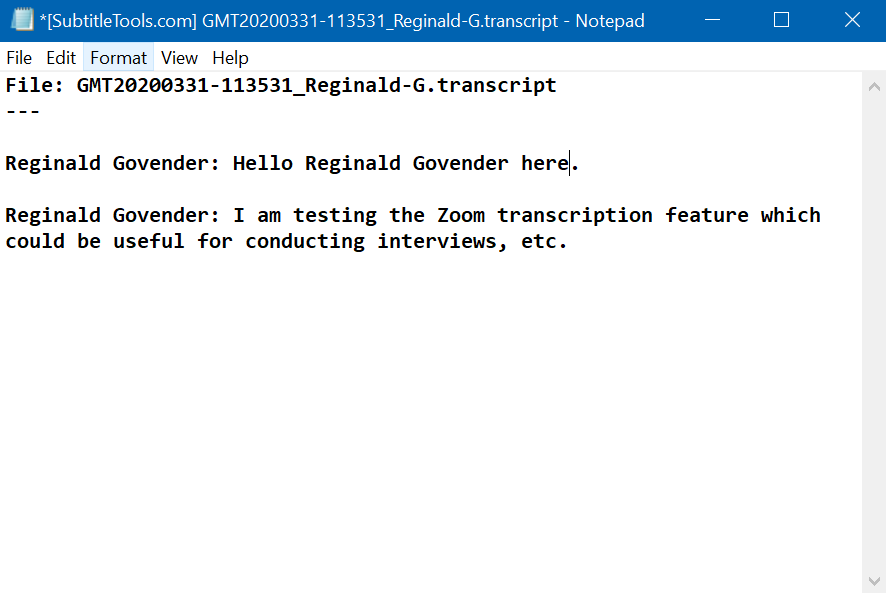
  •  Go to your download folder, you will see a text file.

How it all works?
The transcription is the subtitles from the video recording. You can edit the transcription before downloading the Audio Transcript file by playing the recording.

There are alternative ways but this seemed to be the ideal way.

iSiZulu Version »