Instructional Guide: Zoom Meetings

Overview

Zoom is a live web-conferencing tool used for real-time communication and collaboration between participants (also referred to as synchronous meetings). Zoom meetings can be recorded. Zoom allows for up to 300 people to join in a meeting at a time, using a computer, webcam, mobile device or phone.  It will have the largest draw on bandwidth and requires a stable internet connection. Participants can turn off their webcams (to lower pull on bandwidth).

When To Use

Zoom is great for discussions, best for small groups and best when everyone can meet at the same time.

Use Zoom when:


  • Your meetings require interaction from students, such as meaningful discussions, debates or problem solving.
  • You are bring in live guest speakers for your students.
  • You are having your students break out into small group discussions.
  • You are holding virtual office hours with your students.
  • You have back up tools in place – such as Google Meet
  • You have smaller groups and everyone is available at the same time.

Instructional Guide

Getting Started on Windows and Mac

Zoom unifies cloud video conferencing, simple online meetings, and group messaging into one easy-to-use platform. It offers the best video, audio, and wireless screen-sharing experience across multiple platforms. You can use the Zoom application either by downloading the Zoom desktop client or by visiting the Zoom website directly using a web browser.

Basic Guidelines on How to Create your UKZN Zoom Account and Get a Professional License allocated

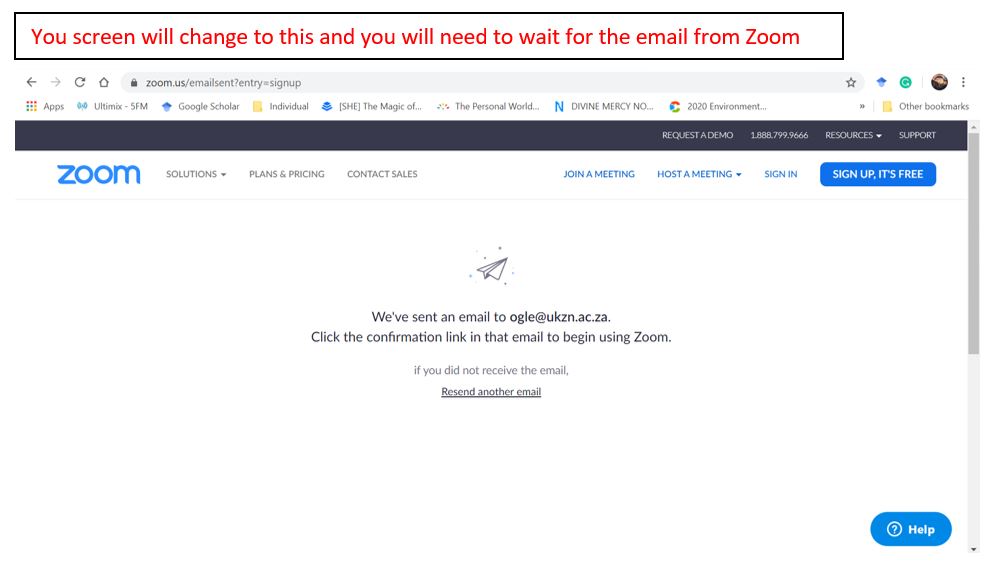
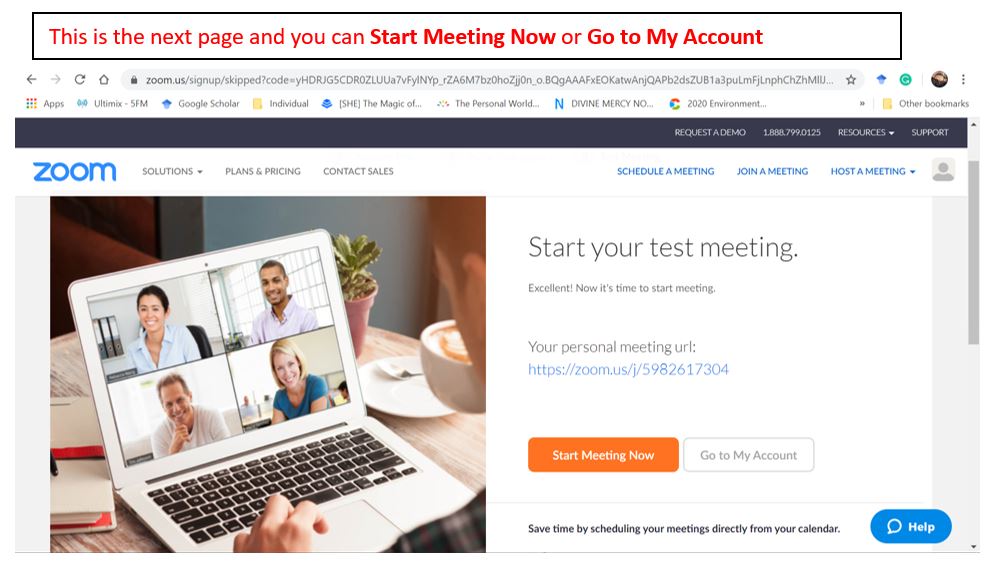
You may join a Zoom meeting without having a Zoom account. However, in order to create a Zoom account and get a professional licence (recommended), you are required to Register with your @ukzn.ac.za email address. Registering for a Zoom account is free. Once this is completed you will be required to activate your account by replying to an email that Zoom will send to the email address that was provided at the time of registration.

In order to obtain a UKZN Zoom License, the following process must be completed:

– Staff members must first register for a free account using their ukzn.ac.za email addresses. If you have used your private/personal email for this process, a UKZN license cannot be issued – only email addresses with the ukzn.ac.za domain name are visible on the Zoom Online Meetings Portal.
– Once this is completed, an email needs to be sent to your School Operations Manager in order to collate and send through to ICS (zoom@ukzn.ac.za)
– A confirmation email will be sent to you once a pro license has been allocated.

All the limitations of a free account (like not having more than 3 people in an online meeting and a maximum time limit of 40 minutes per meeting) will be removed. With a professional licence, you can host an unlimited number of meetings with up to 300 participants and no time limit restrictions will apply.

Step 1:

Step 2:

Step 3:

Step 4:

Step 5:

Step 6:

Step 7:

Step 8:

Exploring the Zoom Desktop Client

Click here to download Zoom desktop client for Windows or Mac, otherwise, you will be prompted to download and install Zoom when you click a join link.

Sign-in and Join

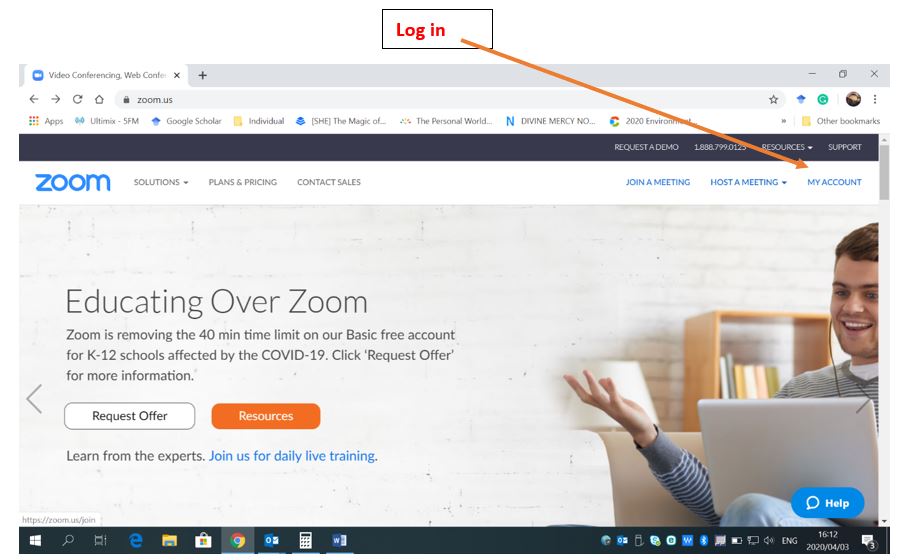
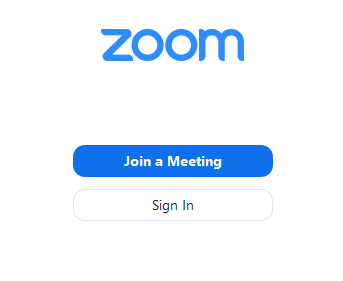
After launching Zoom, click Sign In.

If you don’t have an account, click Sign Up Free. If you have a Zoom account but cannot remember your password, click Forgot.

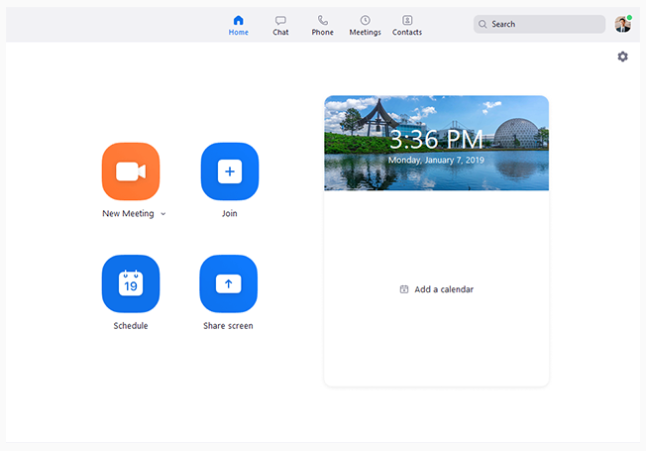
Zoom Home

After signing in, you will see the Home tab, where you can click these options:

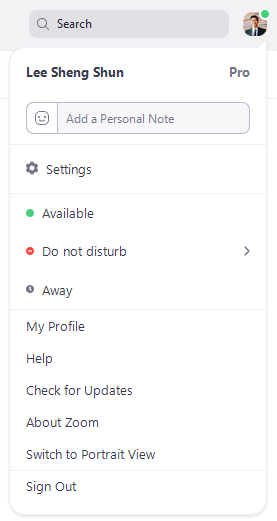
Click your profile picture for these options: 

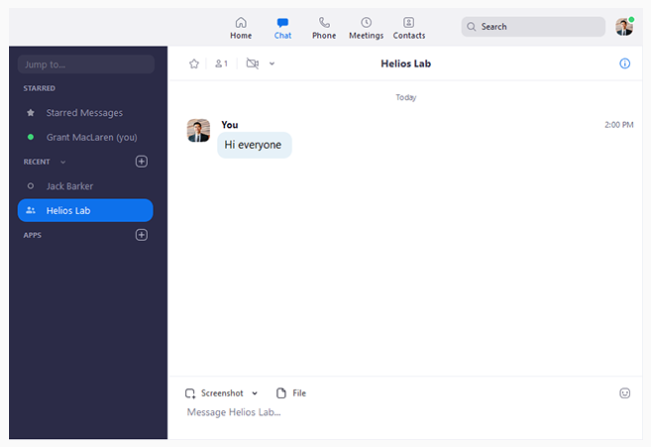
Chat

Select the Chat tab to view private conversations with your contacts or group conversations (channels).

Meetings

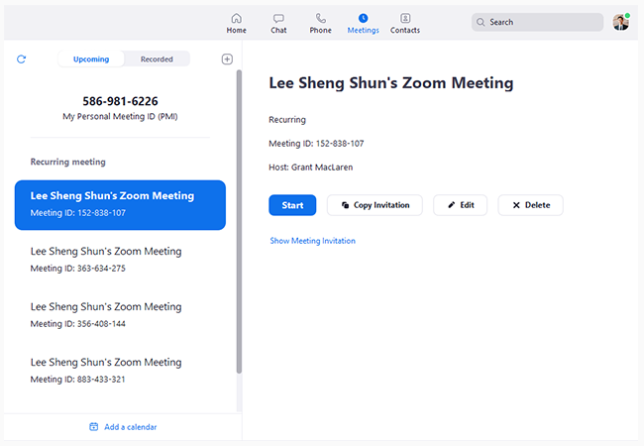
Select the Meetings tab and click Upcoming to view, start, edit, and delete scheduled meetings.

You can click the following options after selecting a scheduled meeting in the left-side panel:

  • Add icon : Schedule a new meeting.
  • Refresh icon : Refresh the meeting list if you don’t see your scheduled meeting.
  • Start: Start the scheduled meeting that you have selected in your upcoming meetings.
  • Copy Invitation: Copy the scheduled meeting’s invitation text, allowing you to manually paste into an email, instant messenger etc. Click Show Meeting Invitation if you want to view the invitation you’re copying.
  • Edit: Edit the meeting options for your scheduled meeting.
  • Delete: Permanently delete your scheduled meeting.

Contacts

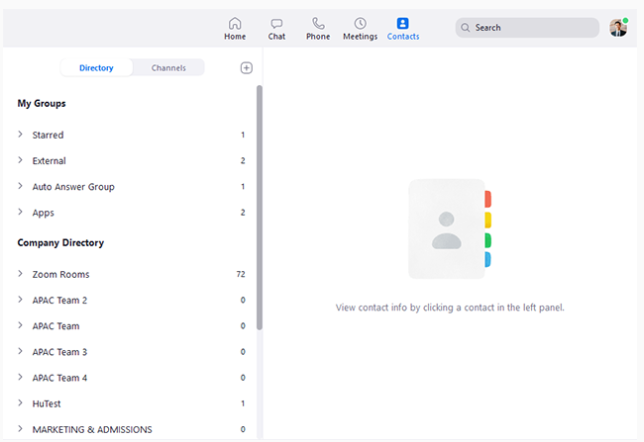
Select the Contacts tab to view and manage your contacts.

  • Directory tab: View a directory of all your contacts, including starred, external, and auto answer contacts. If your organization has Zoom Rooms, you will also see a list of Zoom Rooms.
  • Channels tab: View a directory of your channels (used for group messaging). Starred channels appear at the top of the list.
  • Add icon : Show options for contacts and channels. You can add a contact, create a contact group, create a channel, or join a channel.

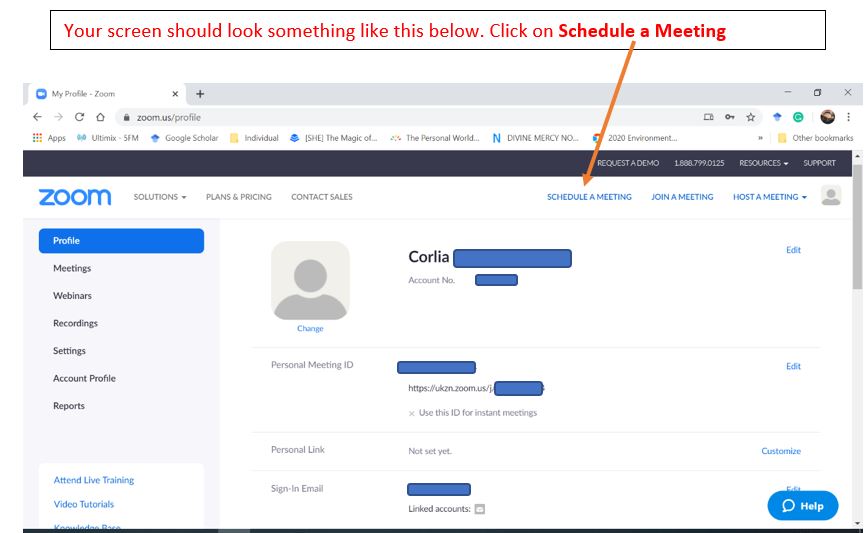
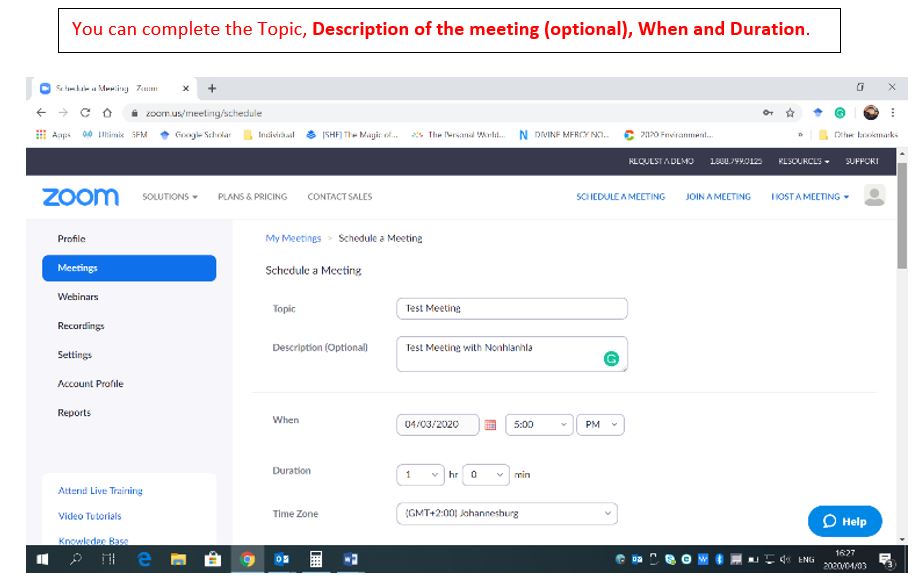
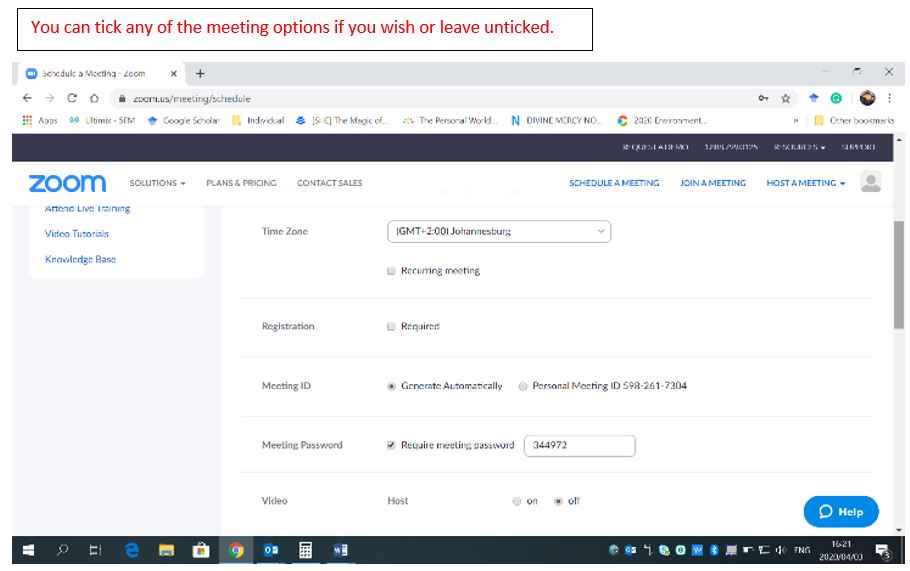
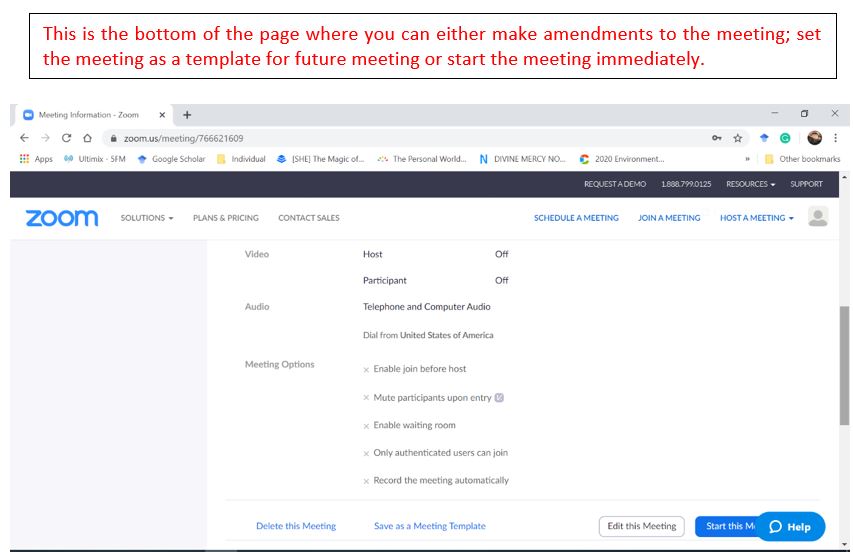
Scheduling a Meeting via the Zoom Website

Step 1:

Step 2:

Step 3:

Step 4:

Step 5:

Step 6:

Step 7:

Step 8:

Step 9:

Joining a Meeting Using the Desktop Client

Step 1:

  • Open the Zoom Desktop client.

    Click Join a Meeting if you want to join without signing in.

  • OR Sign in to Zoom then click Join.

Step 2:

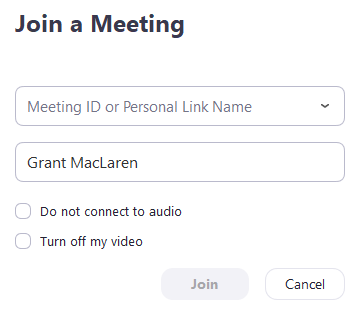
  • Enter the meeting ID number and your display name. If you’re signed in, change your name if you don’t want your default name to appear. If you’re not signed in, enter a display name.

Step 3:

  • Select if you would like to connect audio and/or video and click Join.

Joining a Meeting via Email Invitation

Step 1:

  • You will receive an email invitation from your host.
  • Click on the Join link in the email

Step 2:

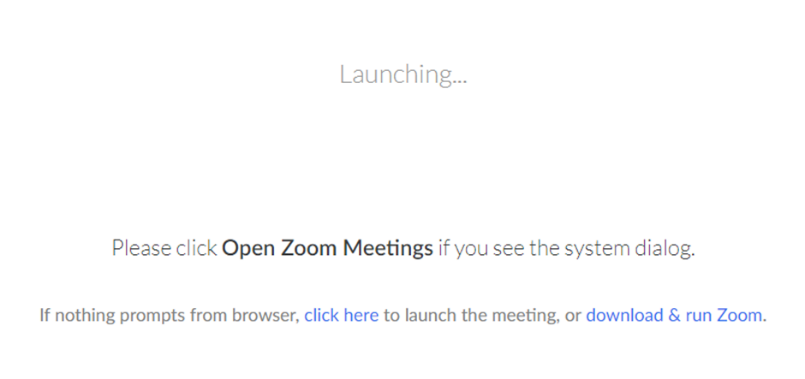
  • You will be prompted to either download or launch Zoom.

Step 3:

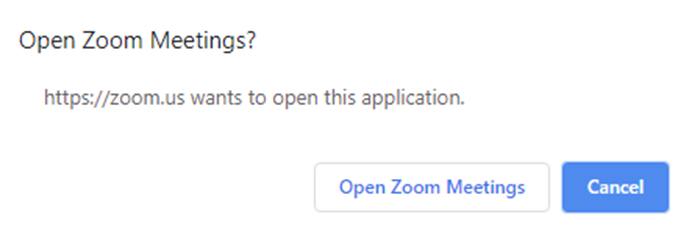
  • Click Open Zoom Meetings when you see the system dialog.

Step 4:

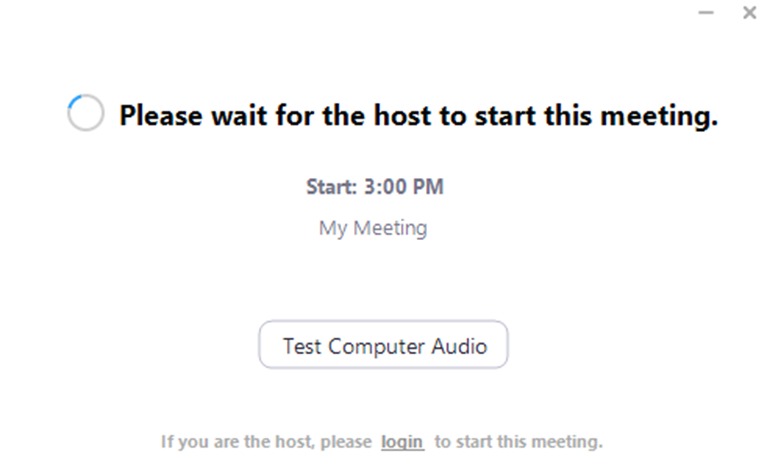
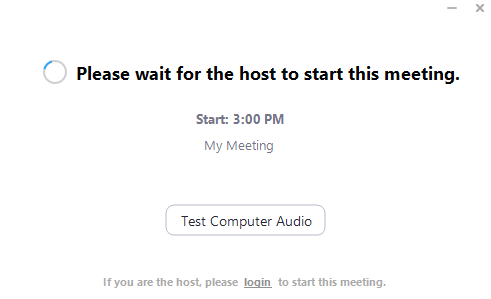
  • Only the host can start the meeting

Step 5:

  • While waiting, you may test your computer audio by clicking on Test Computer Audio. You can test the speaker or mic.

Main content area

Displays the video feed (or chosen icon) of whoever is currently speaking, unless Share Screen is enabled (see below). Other user feeds will be displayed at the top of the page.

Bottom tool bar

Mute: Control your own audio output.

Start Video: Control your video output.

Invite: Use this advanced option if you want to invite users other than your site participants to participate in the meeting.

Manage Participants: Opens a pop-up window listing all participants. From this window you can:

  • mute participants
  • disable video
  • prevent other participants from sharing their screens
  • lock the meeting so no new participants can enter

Share Screen: Share your full desktop or specific windows. Starting Screen Share minimizes the main meeting window and highlights the window you are sharing (if you’re sharing a window and not the desktop). You can stop sharing at any time by clicking Stop Share.

Chat: Communicate with all participants or to send messages to specific participants by clicking on their name in the participants list.

Record: Clicking Record starts recording for the session. Recordings are stored locally on your computer in the folder set in Settings -> Recording. Participants will not be able to record sessions without the host’s permission. If a participant does record the session, the recording will be stored locally on the participant’s computer.

Keyboard Shortcuts for Common Actions

  • Ctrl+Alt+Shift: Move focus to Zoom’s meeting controls
  • Alt: Turn on/off the option “Always show meeting control toolbar” in Accessibility Settings
  • Alt+V: Start/Stop your Video
  • Alt+A: Mute/unmute your Audio
  • Alt+M: Mute/unmute everyone except host Note: For the meeting host only
  • Alt+S: Launch share screen window and stop screen share Note: Will only work when meeting control toolbar has focus
  • Alt+T: Pause or resume screen share Note: Will only work when meeting control toolbar has focus
  • Alt+R: Start/stop local recording
  • Alt+C: Start/stop cloud recording
  • Alt+P: Pause or resume recording
  • Alt+N: Switch camera
  • Alt+F: Enter or exit full screen
  • Alt+H: Display/hide In-Meeting Chat panel
  • Alt+U:Display/hide Participants panel
  • Alt+I: Open Invite window
  • Alt+Y: Raise/lower hand
  • Alt+Shift+T: Screenshot
  • Ctrl+2: Read active speaker name

Tools Available in a Zoom meeting

Many of these are controlled by your in-meeting settings on your Zoom account page accessed through the Portal.


For more help and information, kindly go to Getting Started on Windows and Mac on the Zoom Website.

iSiZulu Version »